Simple Kimchi
Every Korean household makes their own Kimchi and thus there is huge variation in recipe and method. I find this example good to induct oneself into fermenting vegetables. But I would advise not stopping here - play with different vegetables, spices, seasonings, methods and time. Kimchi simply translates as ‘fermented vegetables’ so there is certainly no right or true example, just a myriad of household versions that are hotter, sweeter, fishier, gentler, deep, refreshing - get funky, get fermenting and be a playa with your flayva.
This is my basic recipe for a very accessible Kimchi. No fish heads. No insects or bugs. This recipe is veygan. I use the dry salt method rather than brining - I find dry salting a more sensory experience and as a result gives a more literal introduction to fermenting vegetables. It makes just about enough to fill 5 2litre kilners, so obviously adjust or downsize the volume accordingly (get in touch for guidance if needed) as this batch size provides enough for about 2 weeks of 5 days of service in the cafe. For home use or to try the recipe you may want a much lower volume. Equally, you may want to make a huge batch to sustain the household for a few months.

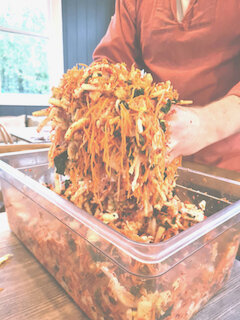
Salting kale and carrots.

******* Updating an even simpler recipe with smaller quantity guide. — imminent. 16/10/22. ******
Paste
Lemongrass 1 bunch of about 4-5 sticks - xtra fine chop
Coriander 1 bunch - rough chop
Chilli 3-5 individual med/hot - fine chop
Garlic bulb - peel and rough chop
Apple - rough chop
Gochugaru (korean red pepper flakes/powder) to taste (supplement with any dried/fresh/whole/flaked chilli you have at your disposal)
Fresh Ginger 200g - rough chop
Bash or Blitz together using either a pestle and mortar or a food processor (I love the romanticism of p and m but this volume calls for a processor unfortunately) to form smoothish paste, little coarseness is fine. Remove any large prominent lemongrass strands etc but eliminate this by careful fine chopping initially.
Vegetables
Play around with veg, I often supplement the main cabbage with whatever is in season or available rather than sticking to the specifics below - as a rule of thumb I like using a dark green, high-chlorophyl veg alongside a lighter, high-water content which is what the asian cabbage and kale cover here.
****Save the base of each cabbage, kale and daikon for plugs ****
4 Asian Cabbages - shredded
1kg Kale - shredded
3kg Carrot - grated
3 Daikon radish - matchsticks
Salt (have lots available) - Add and taste regularly, only add as much as needed to avoid needing to remove or rinse. **** If using this method for vastly different ingredients, read up on your salt choice - see Sandor Katz ‘Art of fermentation’ for in-depth guidance here. *****
6 bunches Spring onion - chopped approx 1cm diagonal rounds


Method
Begin adding salt to cabbage and kale in a very large mixing vessel or bathtub. Bash, squeeze and rub salt into as much of the vegetables as possible. Roll your sleeves up and get your hands in. Add and taste salt whilst doing so. Taste for saltiness - there should be a strong salty finish but not unpalatable if too salty, the carrot and additional veg will dilute. Add the carrot and mix through thoroughly, again tasting - only add salt if it needs it after tasting.
Cover and rest for between 1 -6 hours, aiming to finish it on the same day, although it isn’t disastrous to leave until tomorrow.
Add the spring onion, Daikon and Paste - thoroughly mixing and massaging evenly into the the vegetables. Taste for spiciness or await the finished product and adjust your spice for next time. I like mine hot, but for the more general audience in the cafe I am asked to dull the spice down slightly.
Sterilise jars and evenly distribute kimchi mix into each and ensure all are covered with remaining liquid. Push down firmly adding more as you go. Do not throw away liquid until all of the mix is used and all the veg in each jar is fully submerged with liquid. Leave about a 1cm gap at the top of each jar, place a plug ** on each and seal the jars. Put in a dish and cover with a t-towl. Burp daily for 4-5 days, pushing veg down each time. I like to ferment mine for about two weeks but they will usually be ready for use after 1 week, if really needed. Taste regularly until you find your preferred ferment. Once matured to your taste, keep in the fridge for as long as you want to or even keep fermenting out of the fridge.

Dry-salt ferments.